Baker Drivetrain Klassic Kicker Gear Kit Installation
17 Nov


BAKER DRIVETRAIN KLASSIC KICKER GEAR KIT INSTALLATION INSTRUCTIONS

FEATURES
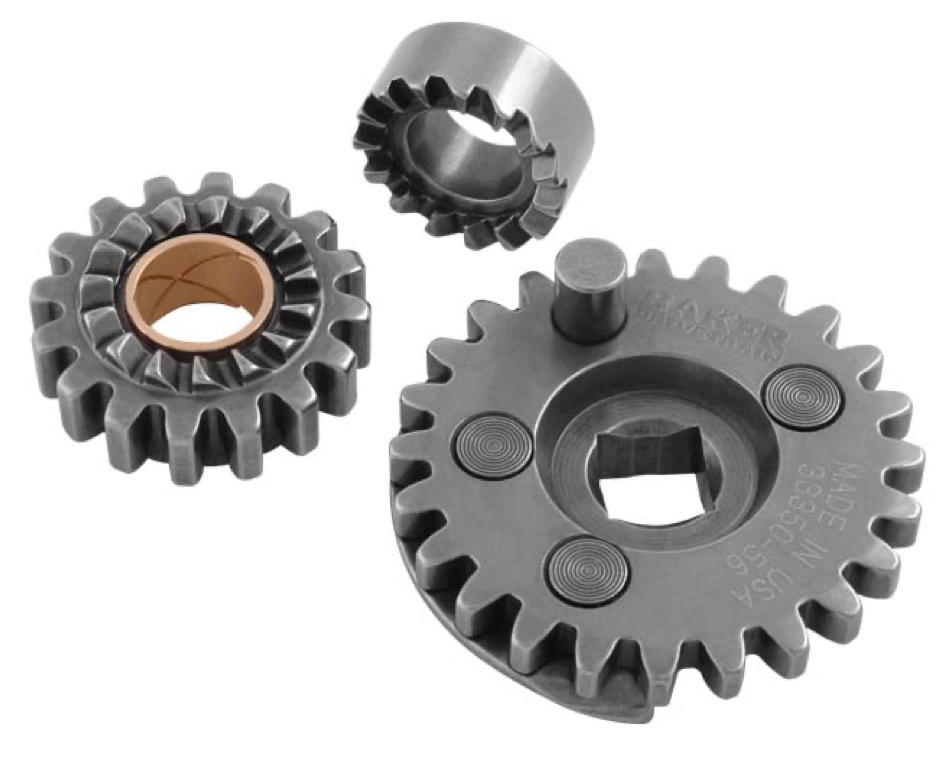
We all know the struggle of that die-hard guy in the crowd determined to kick over his stubborn motor. This beautiful embodiment of man versus machine is pornographic in nature, because starting that bike in a sea of onlookers is truly the money shot. With H-DTM 4-speed replacement parts becoming increasingly difficult to find and Chinese knock-offs being less than reliable, we took the initiative to develop a set of better set of kicker gears. Made in America, and manufactured with BAKER gear technology.
FITMENT
- 1936-1986 H-DTM Big Twin Kicker Equipped Models
- Will Work With 14-Tooth H-DTM Starter Gear
- BAKER 4-Speed, Kicker Equipped Transmissions
- BAKER 6N4, Kicker Equipped Transmissions
INCLUDED PARTS LIST
- PN 33430-56, Starter Gear, 16-Tooth
- PN 33350-56, Starter Crank, 24-Tooth
- PN 33560-56, Starter Clutch
- PN 33393-50, Starter Clutch Key
- PN 292014, Lock Washer, Starter Crank
- PN 6N4-SIDE, Side Cover Gasket
STARTER CRANK GEAR REPLACEMENT
- Remove the transmission side cover assembly. It may be necessary to first remove the brake pedal assembly and exhaust and various brackets before the cover can be removed.
- Carefully remove the old gasket and thoroughly clean both gasket surfaces being careful not to damage them.
- Clamp the starter crank shaft in a vice with starter crank gear facing upwards. Bend the lock tab and remove the nut. Remove the starter crank gear. If necessary, use a suitable puller.
- Clean all parts in a suitable solvent and blow dry.
- Carefully inspect all parts. Check the side cover for cracks. Check the bushings in the cover excessive wear and replace the bushings and o-ring if necessary.
- Coat the starter crank shaft with a suitable assembly lubricant. Reassemble the side cover with new starter crank gear and lock tab. Make sure that starter crank gear is properly “clocked” during assembly. Refer to the factory service manual.
- Install the starter crank gear with a new lock tab. Apply some red thread locking compound to the threads and tighten nut to 42 ft lbs. Bend lock tab against nut.
STARTER CLUTCH AND STARTER CLUTCH GEAR REPLACEMENT
- Remove throw out bearing and pushrod assembly
- Bend lock tab away from starter clutch nut
- Remove starter clutch nut. If top is off of transmission, you may lock transmission in 2 gears at once to lock the mainshaft
- Remove starter clutch using a suitable puller. Sometimes, it is helpful to apply some localized heat if the gear is very difficult to remove. Refer to the factory service manual for proper puller and specifics.
- Clean the tapered end of the mainshaft. Carefully inspect the mainshaft. If the keyway is badly damaged, or there is evidence that the gear has “spun” and the taper is damaged, the mainshaft must be replaced. Minor flaws may be dressed with a file and some emery cloth. Clean and dry the taper with lacquer thinner.
- Check the fit of the starter clutch gear on the mainshaft (dry). The gear must have a small amount of side to side play or “shake”. If the starter clutch gear is too tight, it will seize on mainshaft.
- Coat the bushing in starter clutch gear with a suitable assembly lubricant. Install conical spring with large end facing transmission mainshaft bearing and small end against starter clutch gear.
- Clean and dry taper and inside of starter clutch with lacquer thinner. Be sure that starter clutch fits correctly and squarely on tapered end of mainshaft. Insert the new key into keyway slot in mainshaft and starter clutch. Key must be a slip fit. Do not hammer key into keyway. If necessary, sand key with emery cloth on a flat surface until key fits easily. (Note: when running very large or very high compression motors, it is sometimes advisable to apply a small amount of green sleeve retainer to the tapered end of shaft and coat taper evenly. Again, all parts must be perfectly clean and dry.)
- Install new lock tab and apply red thread lock to threads. Torque nut to 50 ft lbs. Bend the tabs of the provided new lock tab over the sides of the nut with a small punch.
- Install new gasket and install transmission side cover. Apply blue thread lock to fasteners and torque to 20 ft lbs.
- Refill transmission with a suitable lubricant. BAKER recommends SpectroTM PN BD75140.
- Replace exhaust system and any brackets previously removed.


